App navigation
After successfully logging in and selecting a project, you can move to different sections of the app using the tabs in the navigation menu, located on the left of the screen.
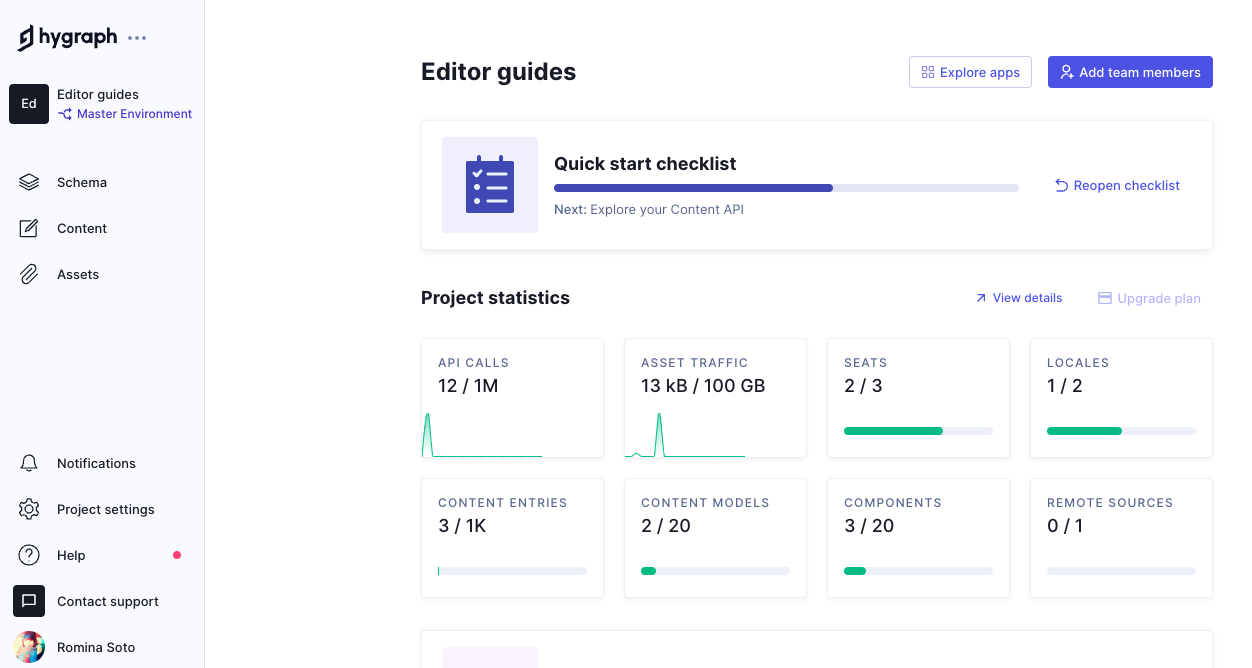
Roles and permissions assigned to users determine what they can see and interact with in the app. The following image shows what the app looks like to a user added to the default Editor system role:
 Hygraph - Default view for Editor role
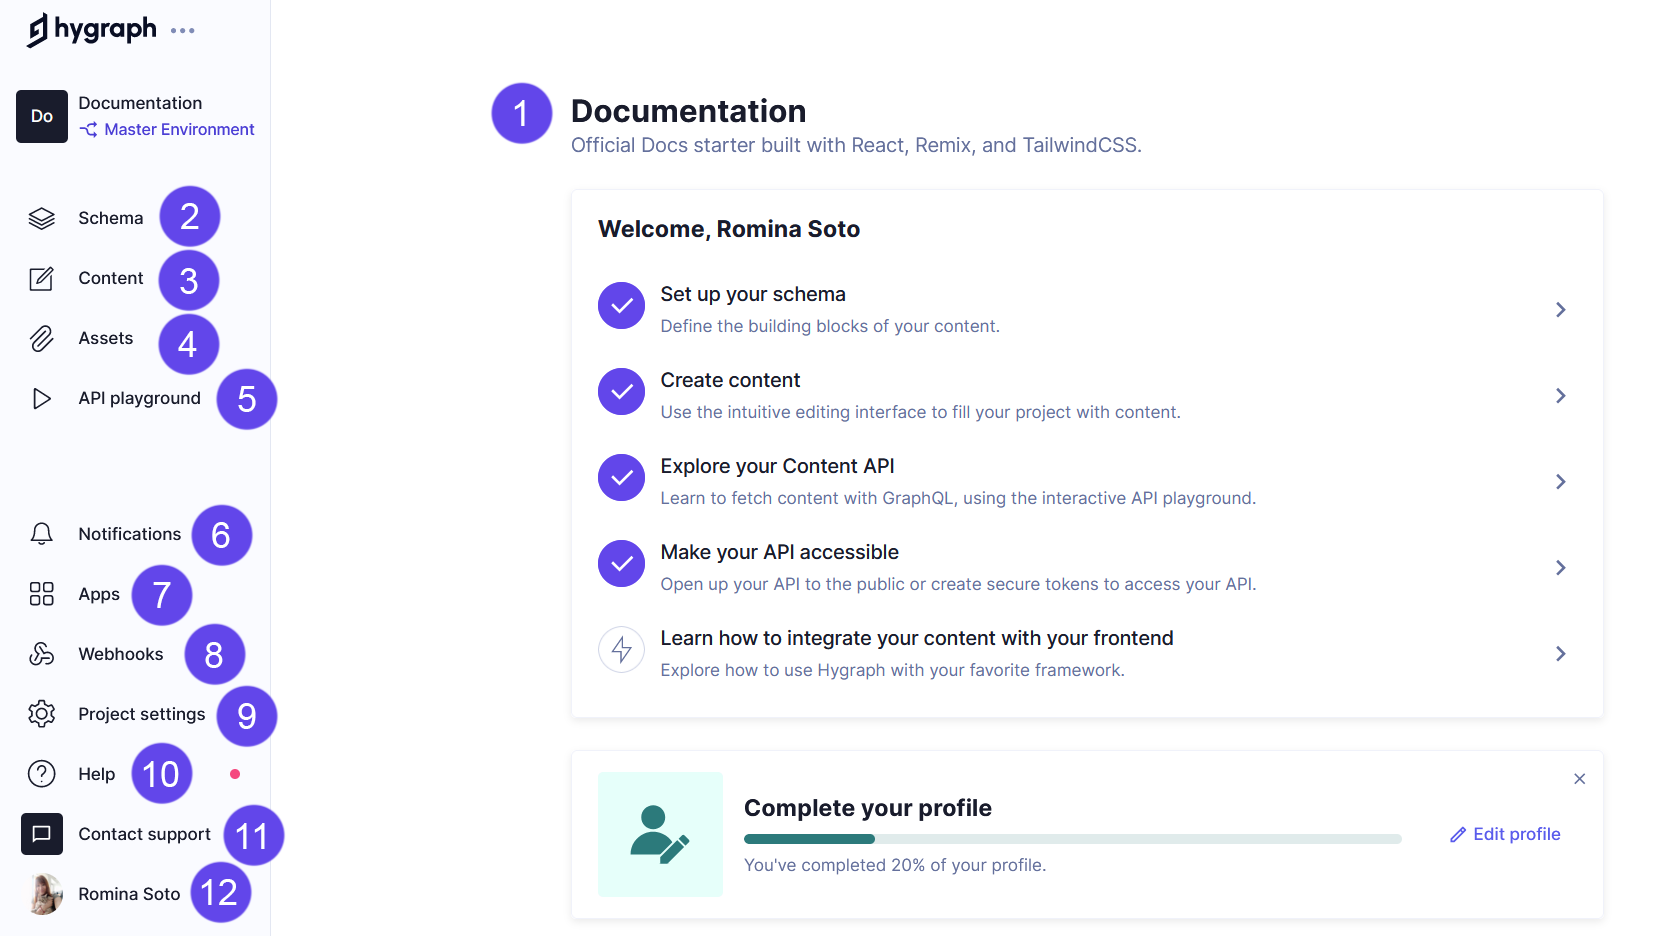
Considering that this view might change depending on your company adding you to a customized Editor role, let's go over all sections available in the app, irrespective of what your role might be:
 Project Dashboard
| App Section | What you can do |
|---|---|
| 1. Overview | Home screen with a start guide and links to support, documentation and examples. |
| 2. Schema Editor | Setup of the content models as required by your project. |
| 3. Content Editor | Access existing content, create custom content views, create/ edit content, review content, and publish content. |
| 4. Digital Asset Manager | Tab to manage and upload your assets. |
| 5. API Playground | An API playground where you can test out API calls. |
| 6. Notifications | A section to manage your notifications. |
| 7. Apps | A section to manage apps. |
| 8. Webhooks | A section to manage webhooks. |
| 9. Project Settings | Details about project information, API access, billing, environments, locales and members |
| 10. Help | Documentation on concepts, code examples, reference apps, features etc. |
| 11. Contact support | Hygraph Public Slack Channel |
| 12. User Settings | Logout and User Configuration |
As an Editor, the Content editor is probably the most relevant section to you, and where you are likely to spend most of your time.