Remote Sources
#Overview
A Remote Source is a custom resolver entry point for your schema that allows data to be sourced from an external third-party web service, and accept field values from other Hygraph fields as arguments.
With Remote Sources, our Content Federation utility, it's possible to add content from other systems and sources to the Hygraph API without having to migrate the content itself.
You can use Remote Sources to add Remote Fields to your schema, at the model or at the top level:
-
At the model level, you can use them to enrich data, which can then be queried in the context of the model that they're a part of.
-
At the top level, you can use them to fetch remote data - unrelated to Hygraph - that can be consumed by your frontend alongside your Hygraph data.
#What you can do
Remote Sources enable teams to build optimized, data-rich applications, where they can use existing services paired with new microservices to build user-friendly applications with a single content entry point.
There are many use cases where moving content into the CMS isn't possible or desirable. Examples include content for which there is a different system of record (e-commerce/product data like price or availability, content from a different vendor like Github or IMDBT, etc) and content that is stored in legacy systems that can’t be easily migrated.
Remote Sources allow customers to create a single GraphQL API with content from all these different sources, providing flexibility for front-end developers and downstream applications.
#Important concepts
-
Remote Source: A system or product that holds content that needs to be combined with content in Hygraph, and which can be queried through a RESTful or GraphQL API. A single Remote Source can have different types of content (e.g. an e-commerce system might have products, categories, prices, etc). Every Remote Source has a unique (base) URL, such as Github, Shopify, Hasura, or a custom backend application.
-
Remote content: Fields you can add to a model to fetch data from a Remote Source. There are two types:
- Remote Field: A field inside a Hygraph model that connects specific remote data to an entry of that model. Remote Fields are always related to a single Remote Source, and a single custom type. RESTful Remote Fields are configured with a path to a specific endpoint in the Remote Source, such as user details from Github, or price & availability from Shopify.
- Top Level Remote Field: A field inside the
Querysystem model in Hygraph. These fields are used to fetch remote data outside the context of a regular model, which is then sent to your frontend alongside your Hygraph data. This Content Federation utility eliminates the need to make separate API requests for data inside & outside of Hygraph.
-
Custom Type: A GraphQL type that is used for content coming from a Remote Source. The custom types are combined with the auto-generated types inside Hygraph to create a single schema for content inside Hygraph and in the Remote Source. For RESTful Remote Sources, custom types need to be defined explicitly using SDL for all URL paths that will be queried in the Remote Source. For GraphQL Remote Sources, the custom types are auto-generated by using introspection on the Remote Source.
-
Custom Input type: A specific kind of GraphQL type that is used to define input parameters for queries to Remote Sources.
#Adding a Remote Source to your project
#Configuring a Remote Source
-
Navigate to the Schema Builder.
-
In the left sidebar, find the
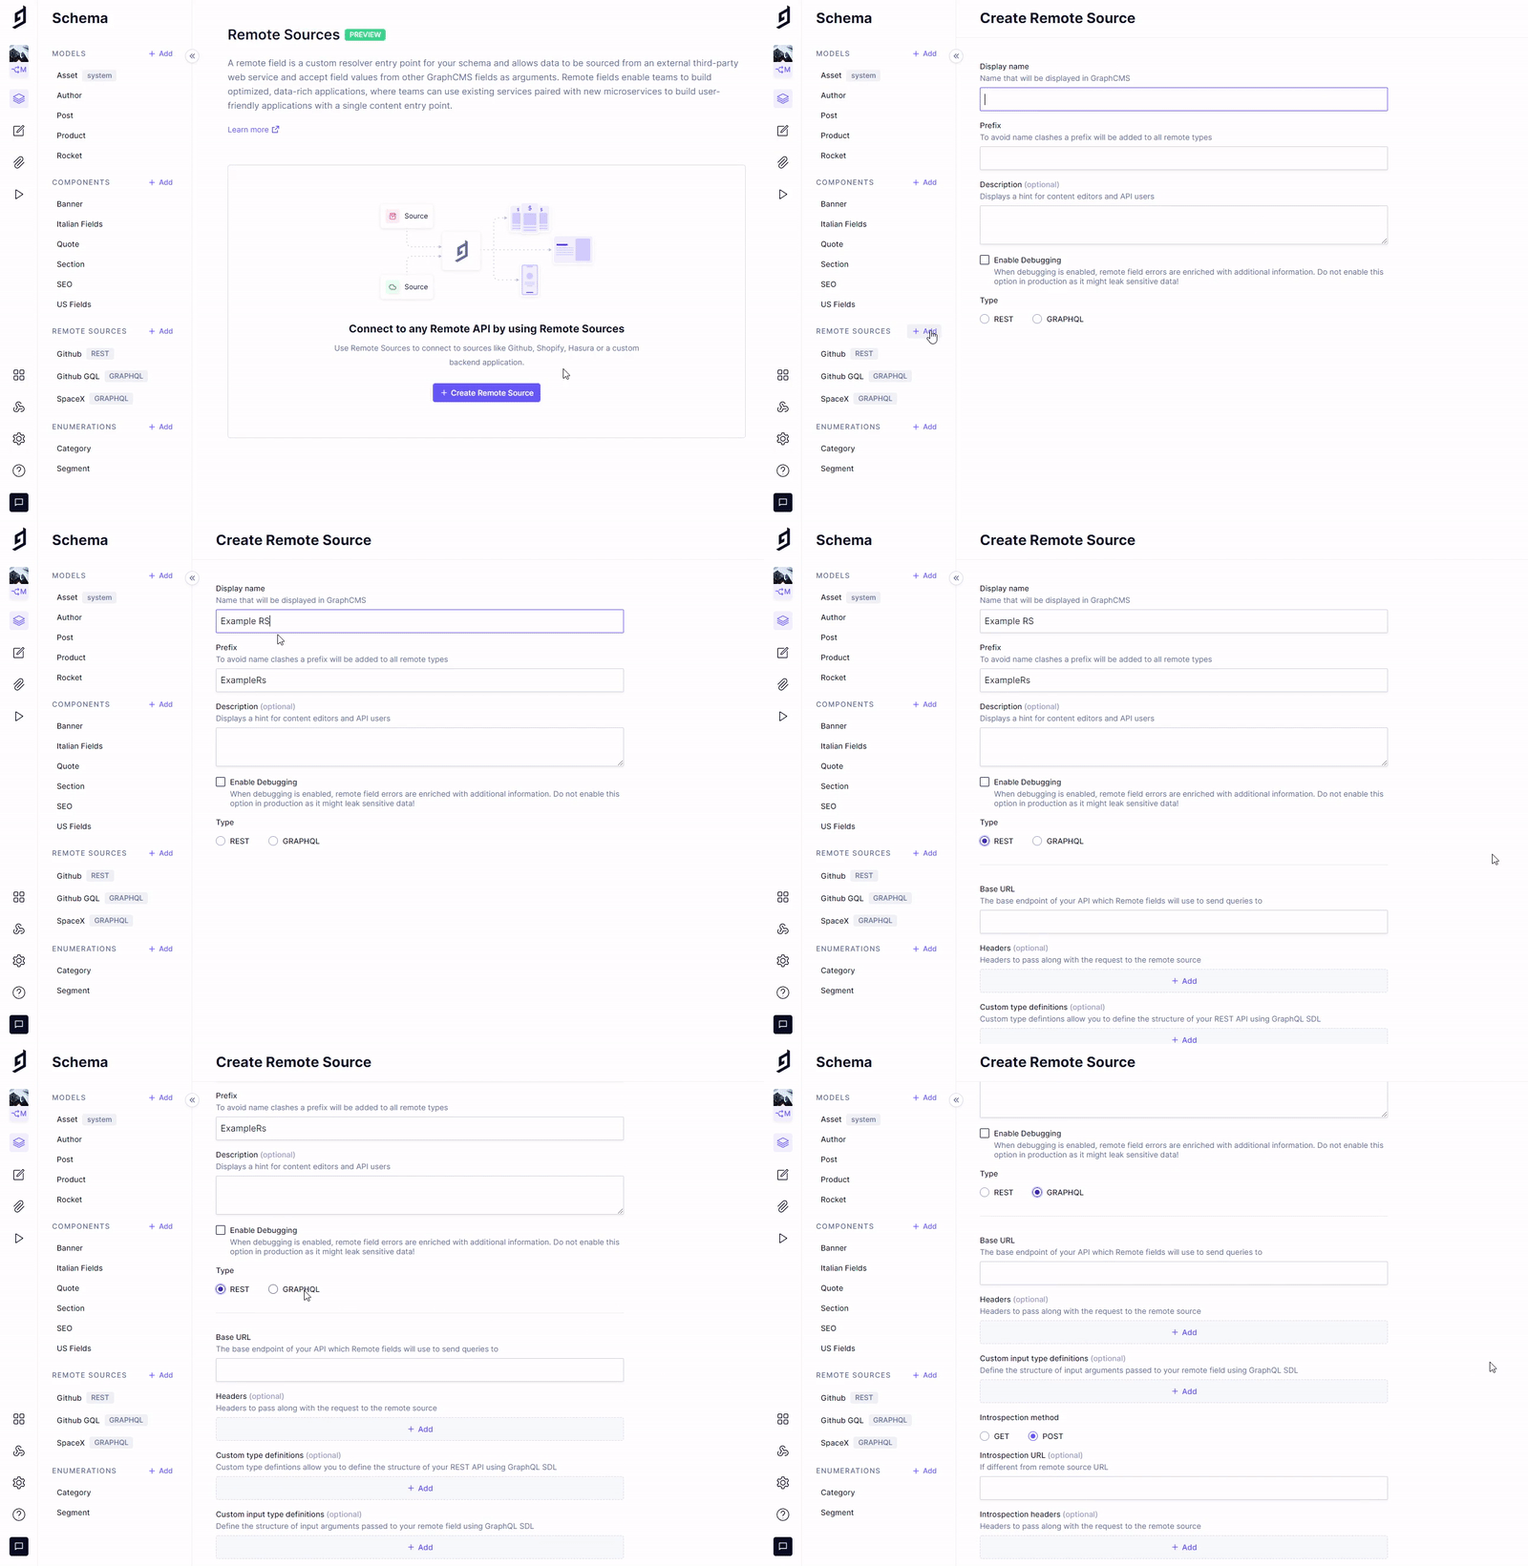
Remote Sourcessection located at the bottom of the list, and then click on+Add. Add a Remote Source
 -
Enter a display name and, optionally, include a description. A prefix is auto-generated and will be pre-pended to all types that are created for this Remote Source. It's also possible to enable debugging for this Remote Source, which will provide more information in case of errors. Make sure to disable this once the Remote Source is properly set up.
-
Set the type to either REST or GraphQL, depending on the type of API that this Remote Source will connect to.
-
Provide a base URL. All Remote Fields that connect to this Remote Source will use that base URL.
-
Optionally, you can include HTTP headers that will be added to all API requests for all Remote Fields connected to this Remote Source. Example use cases include authorization and accepted media types.
-
If you selected REST in step 4, you can now define your custom types. These provide the mapping from the API responses to the GraphQL schema. Custom input types can optionally also be defined here.
If you selected GraphQL in step 4, you can optionally provide an alternative introspection URL and custom headers to send to the introspection endpoint. If no separate introspection URL is provided, the base URL will be used (the default behavior for most GraphQL APIs is to allow querying and introspection on the same URL). Custom input types can optionally also be defined here.
#Creating a custom type definition
When connecting to a remote REST API you will have the option to define a Custom Type Definition, which allows you to specify the shape of the response coming from the API. It will allow you to query the REST API as if it were native GraphQL. These Custom Type Definitions use GraphQL SDL (Schema Definition Language).
In order to create such a definition, you can follow these steps:
- While adding a new Remote Source, or editing an existing one, scroll down to
Custom Type Definitionsand click on+Add. - You can use our JSON to SDL converter tool to transform the JSON response from your API into valid GraphQL SDL. You might need to make a few tweaks to the generated SDL, especially changing the
JSONtype toJson(note the difference in casing).
Here's an example of what that would look like:
-
Add the SDL for your custom type to the input field. It's possible to add multiple types in a single input field, after saving the types will be moved to separate fields.
-
Press
CreateorSaveon the top right corner
Custom types also support nesting, so they can make use of another type, as shown below:
type Product {name: StringmetaInfo: MetaInfoslug: String}
type MetaInfo {createdAt: DateTimecreatedBy: Stringcurrency: String}
In this example, the custom Product type makes use of another custom type MetaInfo.
Click here to learn how to use a custom type definition
#Creating a custom input type definition
Remote Fields also allow you to pass along input parameters to your Remote Source endpoint. This can be useful if the identifiable information for the remote data isn't kept in Hygraph, but defined on a request basis. This is relevant for both the REST and GraphQL Remote Sources.
To create such a definition and to use it in a query, you will need to follow these steps:
-
While adding a new Remote Source, or editing an existing one, scroll down to
Custom Input Type Definitionand click on+Add. -
Similar to the Custom Types, you need to use the GraphQL Schema Definition Language (SDL) to define what the input parameter will look like. A tool that could be used here is JSON2SDL, which allows translating a JSON object to a valid SDL. Keep in mind that we are not defining a type here, but an input.
Let's take an example of passing a
productIdto our Remote API, that will be used as an input argument. The SDL would look like this:input productInput {productId: String!}
Click here to learn how to use a custom input type definition
#Refreshing a GraphQL Remote Source
If something changes on your GraphQL API - i.e., adding or removing fields, or changing types - you can refresh the Remote Source.
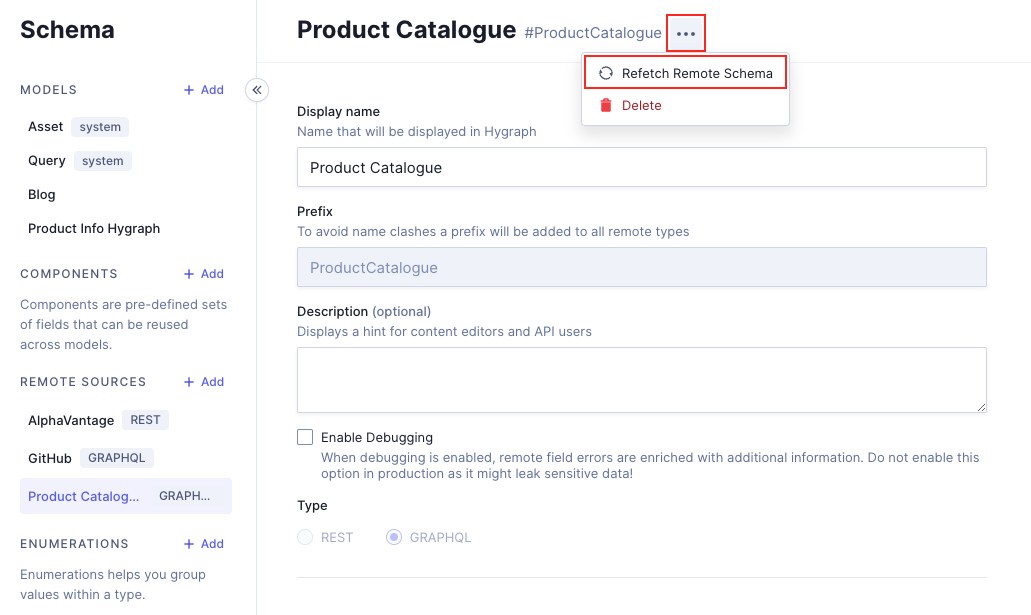
 Refetch Remote Schema
To do this, navigate to the GraphQL Remote Source you want to refresh, click on the context menu, then click on Refetch Remote Schema.
This sends the new introspection query through the API, and once it goes through successfully, you can use the new fields.
If there is an error happening on refetching, please check the Query section of your Remote Source configuration screen. Make sure that your remote fields are not using a type that's been updated or removed, and that the return type is not using it either.
Point 5 of our GraphQL Adding remote data to your model document section covers introspection queries.
This issue can be avoided by working on additive changes.
#Known issues and tips
If you work with Remote Sources and you query a lot of entries at the same time, make sure to use sensible pagination limits within Hygraph, so requests to a third-party API are not rate limited or blocked.
When defining a custom type, you can use all the default GraphQL Scalars such as String, Int, Float, Boolean, ID and additionally Json. ! can be used to indicate a field not being nullable, [Type] will indicate a list (array). More info on the object types and fields can be found here: https://graphql.org/learn/schema/
#Step-by-step example
In this example we're going to create a REST remote source to connect our product information using Federate This.
Navigate to the Schema builder and click on +Add next to Remote sources to create a new one. Use the following information:
| Field | Input |
|---|---|
| Display name | Third Party APIs |
| Prefix | ThirdPartyApIs |
| Type | Select REST |
| Base URL | https://www.federatethis.com/api |
Custom type definition:
Click + Add custom type definition and we'll paste the product type and products array from Federate This:
type Product {id: Intname: Stringprice: Intdescription: Stringimage: Stringcategory: Stringrating: FloatnumReviews: IntcountInStock: Int}type Products {data: [Product]}
We'll also add the following under Products:
type ProductMeta {data: Product}
What we just added will have a data field that will bring a singular product.
Click Add at the top-right corner of your screen to create the remote source.
Once the remote source is created, you can use it to add a remote field. Click here to follow this example.
#Example - Working with custom input types
In this example, we will see how we can define and use a custom input type on a Remote Field. We will be using the Github REST API, specifically the users endpoint.
#Step 1: Configure Github as Remote Source
We'll first add the Github API as a Remote Source and configure the right custom (input) types.
Set up a new remote source as described above, using [https://api.github.com](https://api.github.com) as the base URL, then add a custom type with the following SDL:
type User {avatar_url: Stringbio: Stringblog: Stringcompany: Stringcreated_at: DateTimeemail: Stringevents_url: Stringfollowers: Intfollowers_url: Stringfollowing: Intfollowing_url: Stringgists_url: Stringgravatar_id: Stringhireable: Booleanhtml_url: Stringid: Intlocation: Stringlogin: Stringname: Stringnode_id: Stringorganizations_url: Stringpublic_gists: Intpublic_repos: Intreceived_events_url: Stringrepos_url: Stringsite_admin: Booleanstarred_url: Stringsubscriptions_url: Stringtwitter_username: Stringtype: Stringupdated_at: DateTimeurl: String}
Also add a custom input type with the following SDL:
input githubInput {userId: String!}
#Step 2: Set up the Remote Field
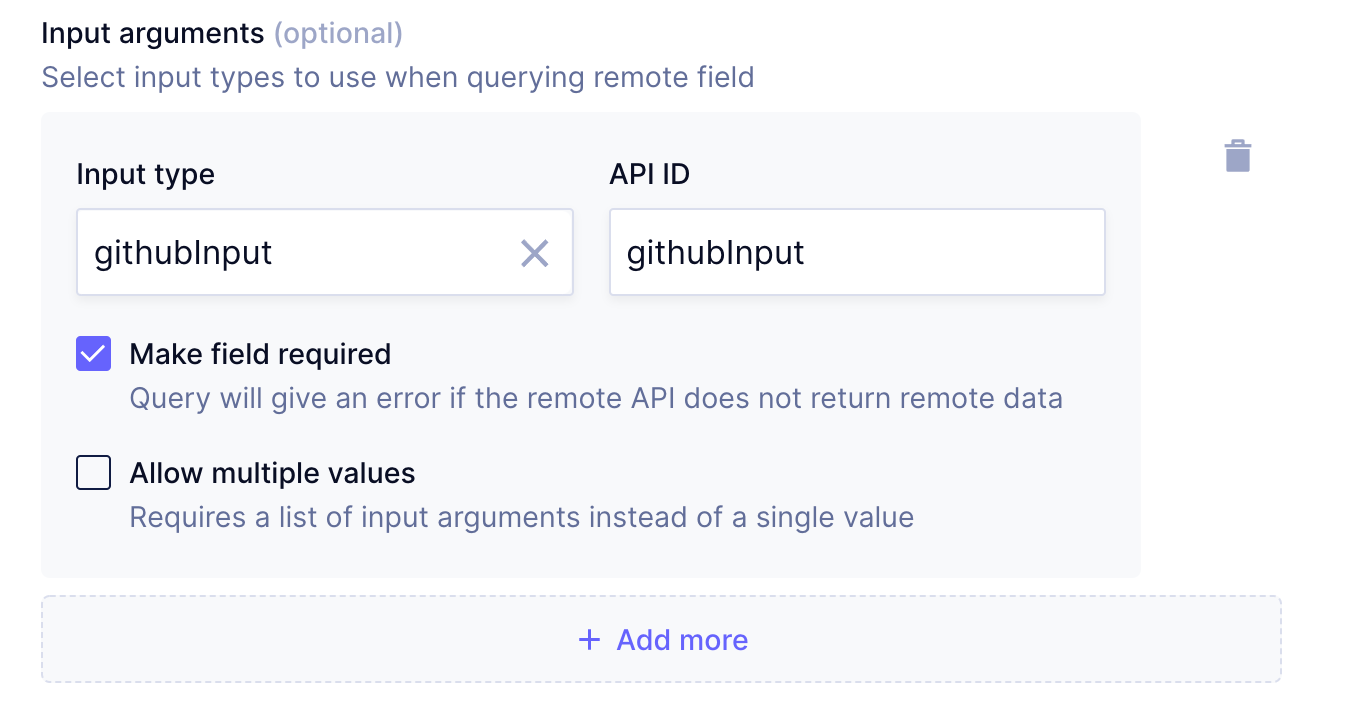
In an appropriate model, set up a REST Remote Field. In this example, we will use a model called Author and set up the Remote Field with apiId githubUserDetails. In the Remote Field config, add an input argument and select the input type to be the previously created githubInput. In the example, we will use the auto-generated API ID githubInput for the input arguments. We'll also set the field to be required since we will make the path depend on the input value.
 Untitled
Now configure the Remote Field's path to use the input argument. You can use the autocomplete feature in the handlebars notation for this.
 Untitled
#Step 3: Query the field
Make sure there is at least one entry for the selected model, and then head over to the API Playground. The input argument can now be used in a query in the following way:
query MyQuery {author(where: { id: "<some_id>" }) {idgithubUserDetails(githubInput: { userId: "hygraph" }) {namebio}}}
Please note that since we've made the userId parameter required in the custom input type (by adding a ! at the end), there will be an error if we don't supply the value properly.