Connect your Hygraph project to Aprimo
Aprimo is an AI-powered content operations platform that allows you to organize, store, retrieve, and distribute digital assets in a centralized and structured manner.
#What you can do with the Hygraph-Aprimo integration
With this app you can manage, measure, and monitor your digital assets right within your Hygraph UI.
#Prerequisites to use this integration
- You must have a Hygraph account. If you don't have one, you can create one here.
- You must have a Hygraph project with at least one model.
- You must have an Aprimo account. If you don't have one yet, you can book a demo here.
- You must get the following information from your Aprimo account and have it at hand for installation:
Tenant name,Client ID,Client secret.
Apps are environment specific. This means their configuration is applied per environment. Take this into consideration if you're working with a project using more than one environment.
#Install the Aprimo app
Click here to install the Aprimo app on Hygraph, then follow these steps:
- Use the dropdowns to select which project and environment you want to install the app in, then click on
Install app. - The permissions pop-up will display. Click on
Authorize appto continue. You will be redirected to the configuration screen. - Fill in the
Tenant name,Client ID,Client secretfields with the information your copied from your Aprimo account. - Click on
Save config settingsto finalize the installation process. A pop-up notification on the bottom right corner of the screen will indicate that the changes have been saved.
#Add the Aprimo field to your model
- Navigate to the Schema builder.
- Select the model that you want to add the Aprimo field to and click on it.
- Select the Aprimo field from the Add fields right sidebar.
- Complete the
Display namefield; this will autocomplete theAPI IDfield. Optionally, you can also add aDescription. - This screen also allows you to control different properties of your Aprimo field: you can allow multiple values, or you can localize the field, by selecting the checkboxes in the
Field optionssection. - Click
Addto save.
#Use Aprimo in your Hygraph project
-
Navigate to the Content editor.
-
Select the view that you configured the Aprimo field for.
-
Click on the
+ Add entrybutton or, alternatively, edit an existing entry by clicking on the pencil icon. -
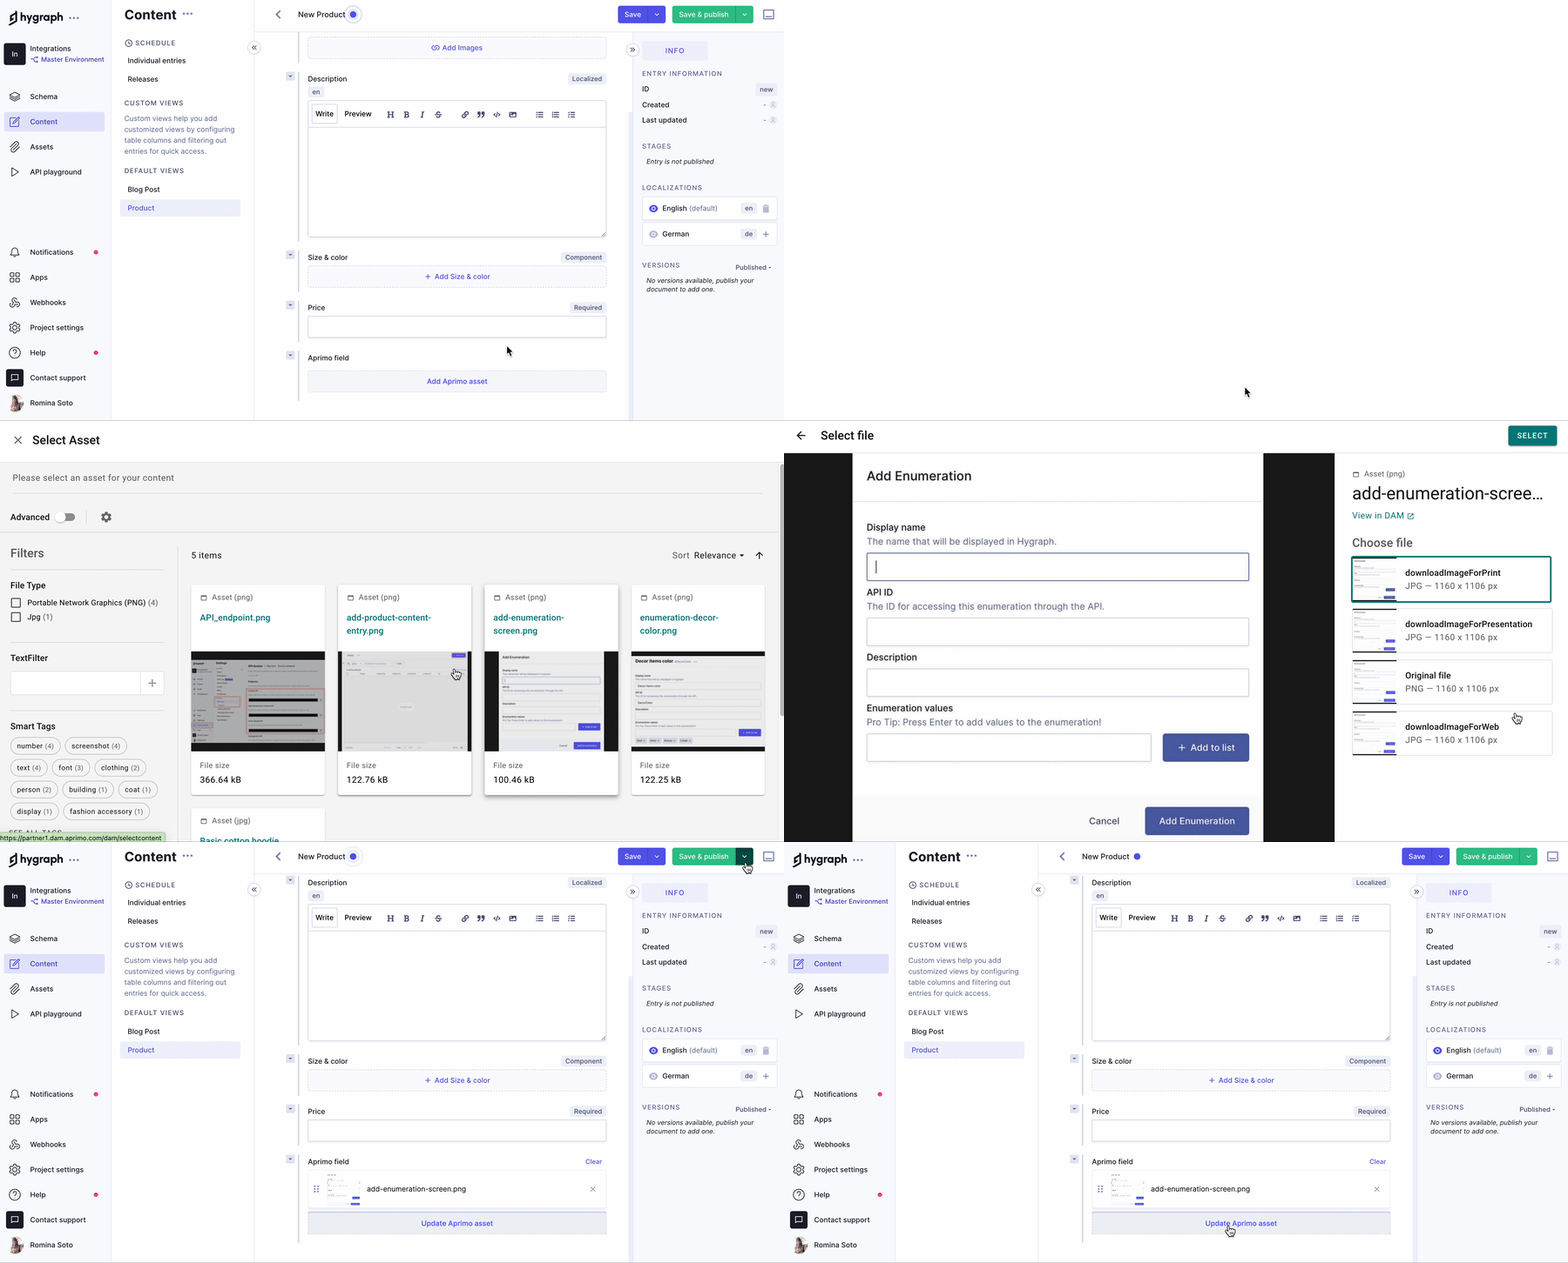
Locate the Aprimo section of the screen and click on
Add Aprimo asset. If you haven't logged into Aprimo, you may need to enter your login credentials to continue. This opens a new screen where you can select one or more of you existing assets, depending on field configuration. -
Select the asset you want by clicking on it. If your Aprimo field is configured for multiple assets, you can use the checkboxes to select the assets you want. Click
Selecton the top-right corner of the screen to add the selected assets to the content entry.Pro Tip- If your Aprimo field is configured to select only one asset, Aprimo will let you select which rendition of the image you want to add to your entry. Check out this section of the guide to learn how to do this
- If you cannot view your images in the picker screen, check out our troubleshooting section.
-
After selecting the asset(s) you want and returning to the content entry, your selection will display on the list. You can optionally use the six-dots handlebar to drag and drop the assets to organize them in the order you want.
-
Finally, click
SaveorSave & Publish- depending on your workflow - to save your entry.
#Aprimo image renditions
If you Aprimo field is configured to allow only one value, clicking on Add Aprimo asset will still display the selection screen, but there will be a diference in how the process follows.
 Aprimo image renditions
Instead of using checkboxes to select the image you want, you will click on an image, and you will be taken to a second selection screen where you can select from a variety of image renditions.
Different image renditions will only be available if the images were configured to have multiple versions in Aprimo.
Select a rendition and then click Select to add the image to your content entry.
#Troubleshooting
#I can't view my images
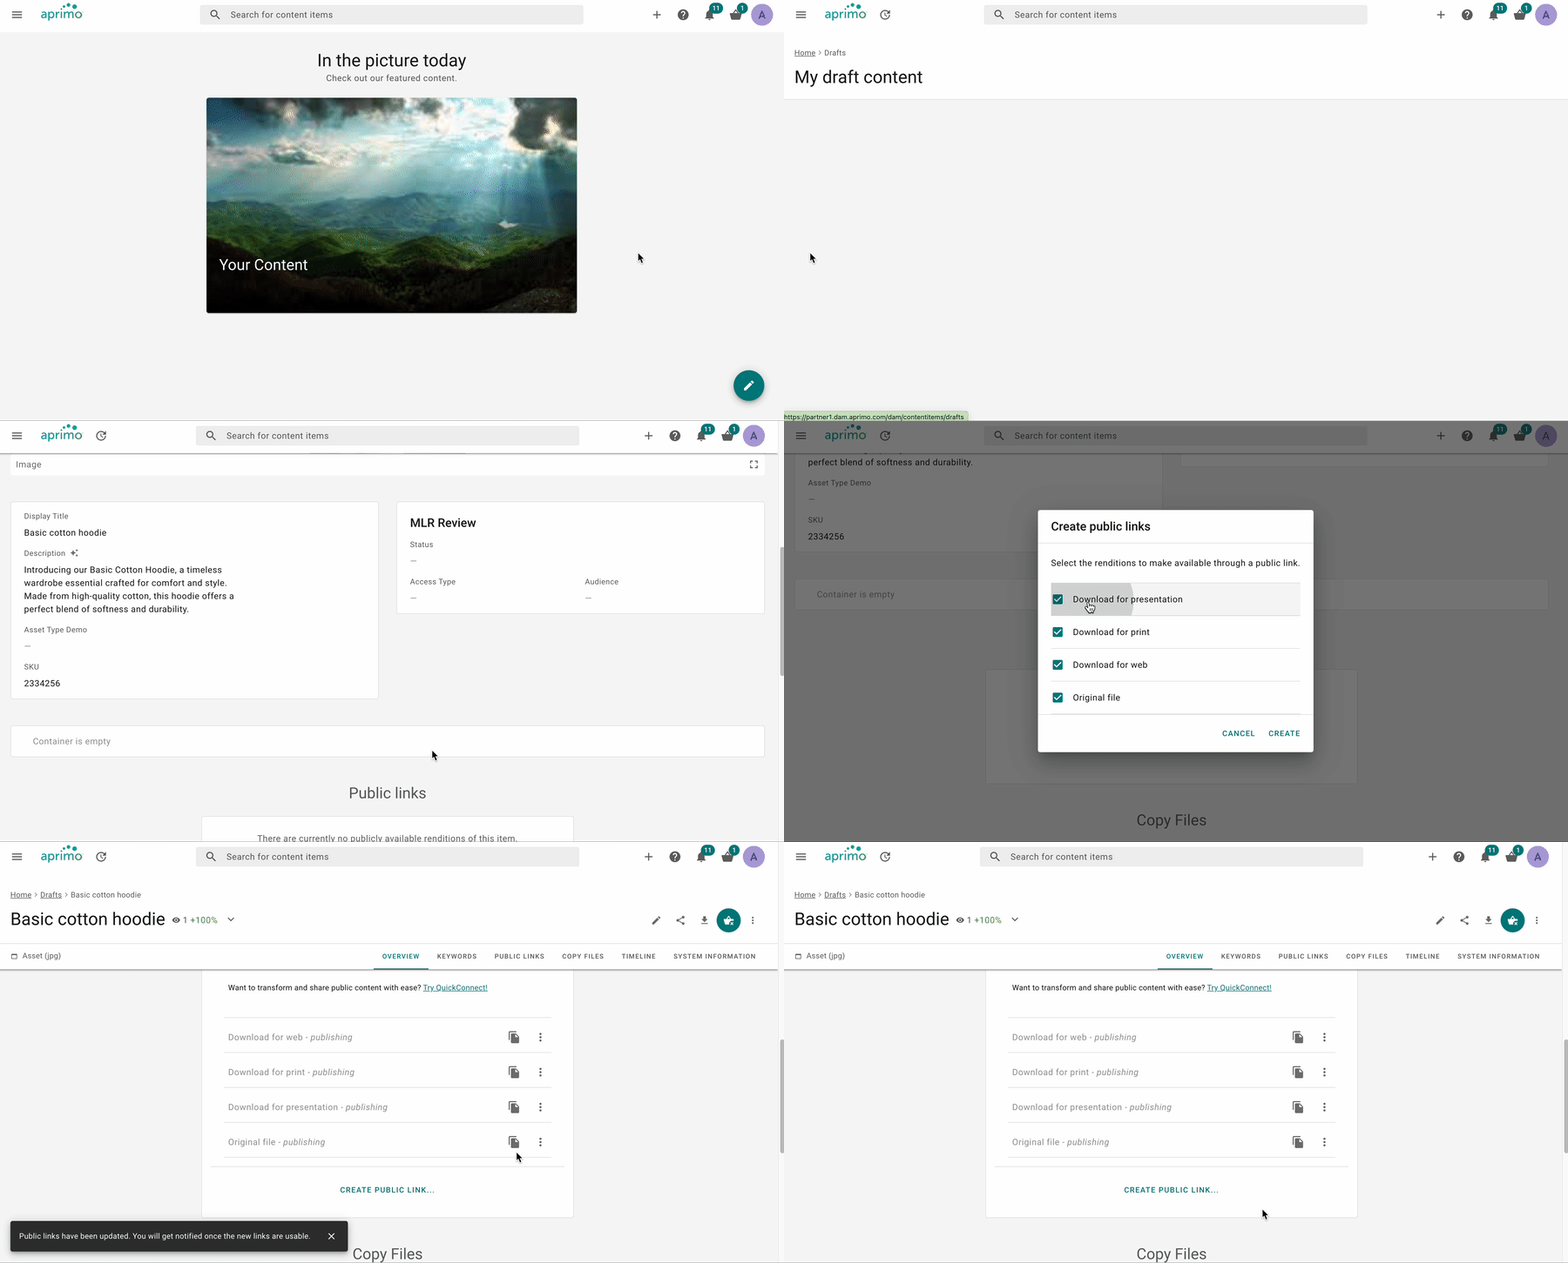
If you cannot view your images in the picker screen, make sure that the images in your Aprimo account have public links.
 Aprimo public links
To create a public link:
- Go to Drafts in your Aprimo account
- Select the image you want to give public links to
- Scroll down to the Public links section of the screen and click
Create public link... - Use the checkboxes to select the renditions you want to make available and click
Create
#Resources