Connect your Hygraph project to Cloudinary
Cloudinary empowers companies to deliver visual experiences that inspire and connect by unleashing the full potential of their media.
The Cloudinary UIX has been deprecated. If you are using it, you need to replace it with the App. Here is a step-by-step guide on how to do it.
#What you can do with the Hygraph-Cloudinary integration
- You can continue to use Cloudinary as your preferred DAM solution for images, videos, and other digital assets, in a similar way that you would use assets hosted by Hygraph.
#Prerequisites to use this integration
- You must have a Hygraph account. If you don't have one, you can create one here.
- You must have an Cloudinary account. If you don't have one, you can create one here.
Apps are environment specific. This means their configuration is applied per environment. Take this into consideration if you're working with a project using more than one environment.
#Install the Cloudinary app
Click here to install the Cloudinary App on Hygraph, then follow these steps:
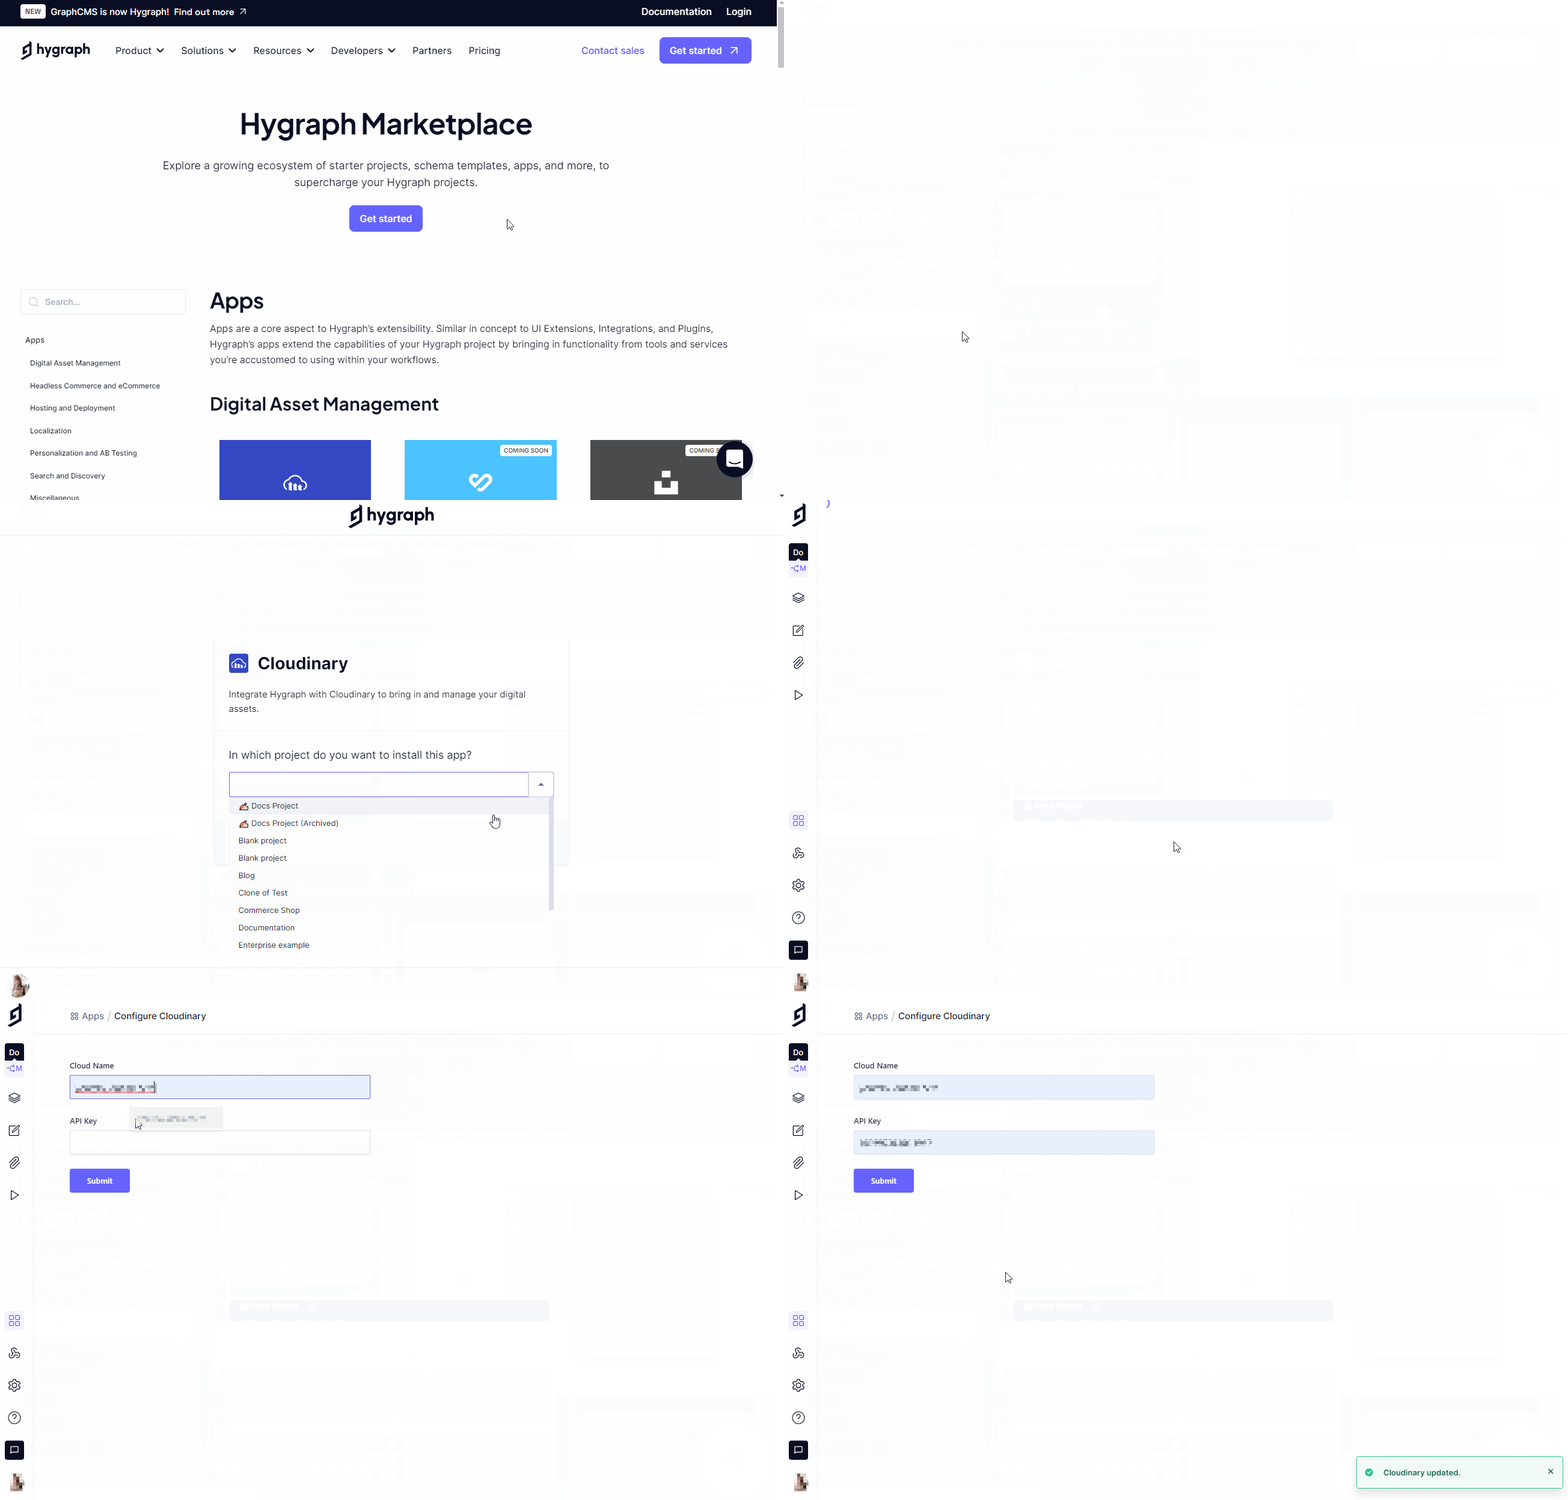 Cloudinary installation
- In the dropdown, select which project you want to install the app in, then click on the
Add Appbutton. You should be redirected to the Configure Cloudinary section of your Hygraph project dashboard. - Fill in the
Cloud NameandAPI Keyfields using the information available in the Account Details section of your Cloudinary account. - Click on the
Submitbutton. A pop-up notification in the lower right corner of the screen will indicate that the changes have been saved.
#Add the Cloudinary asset field to a model
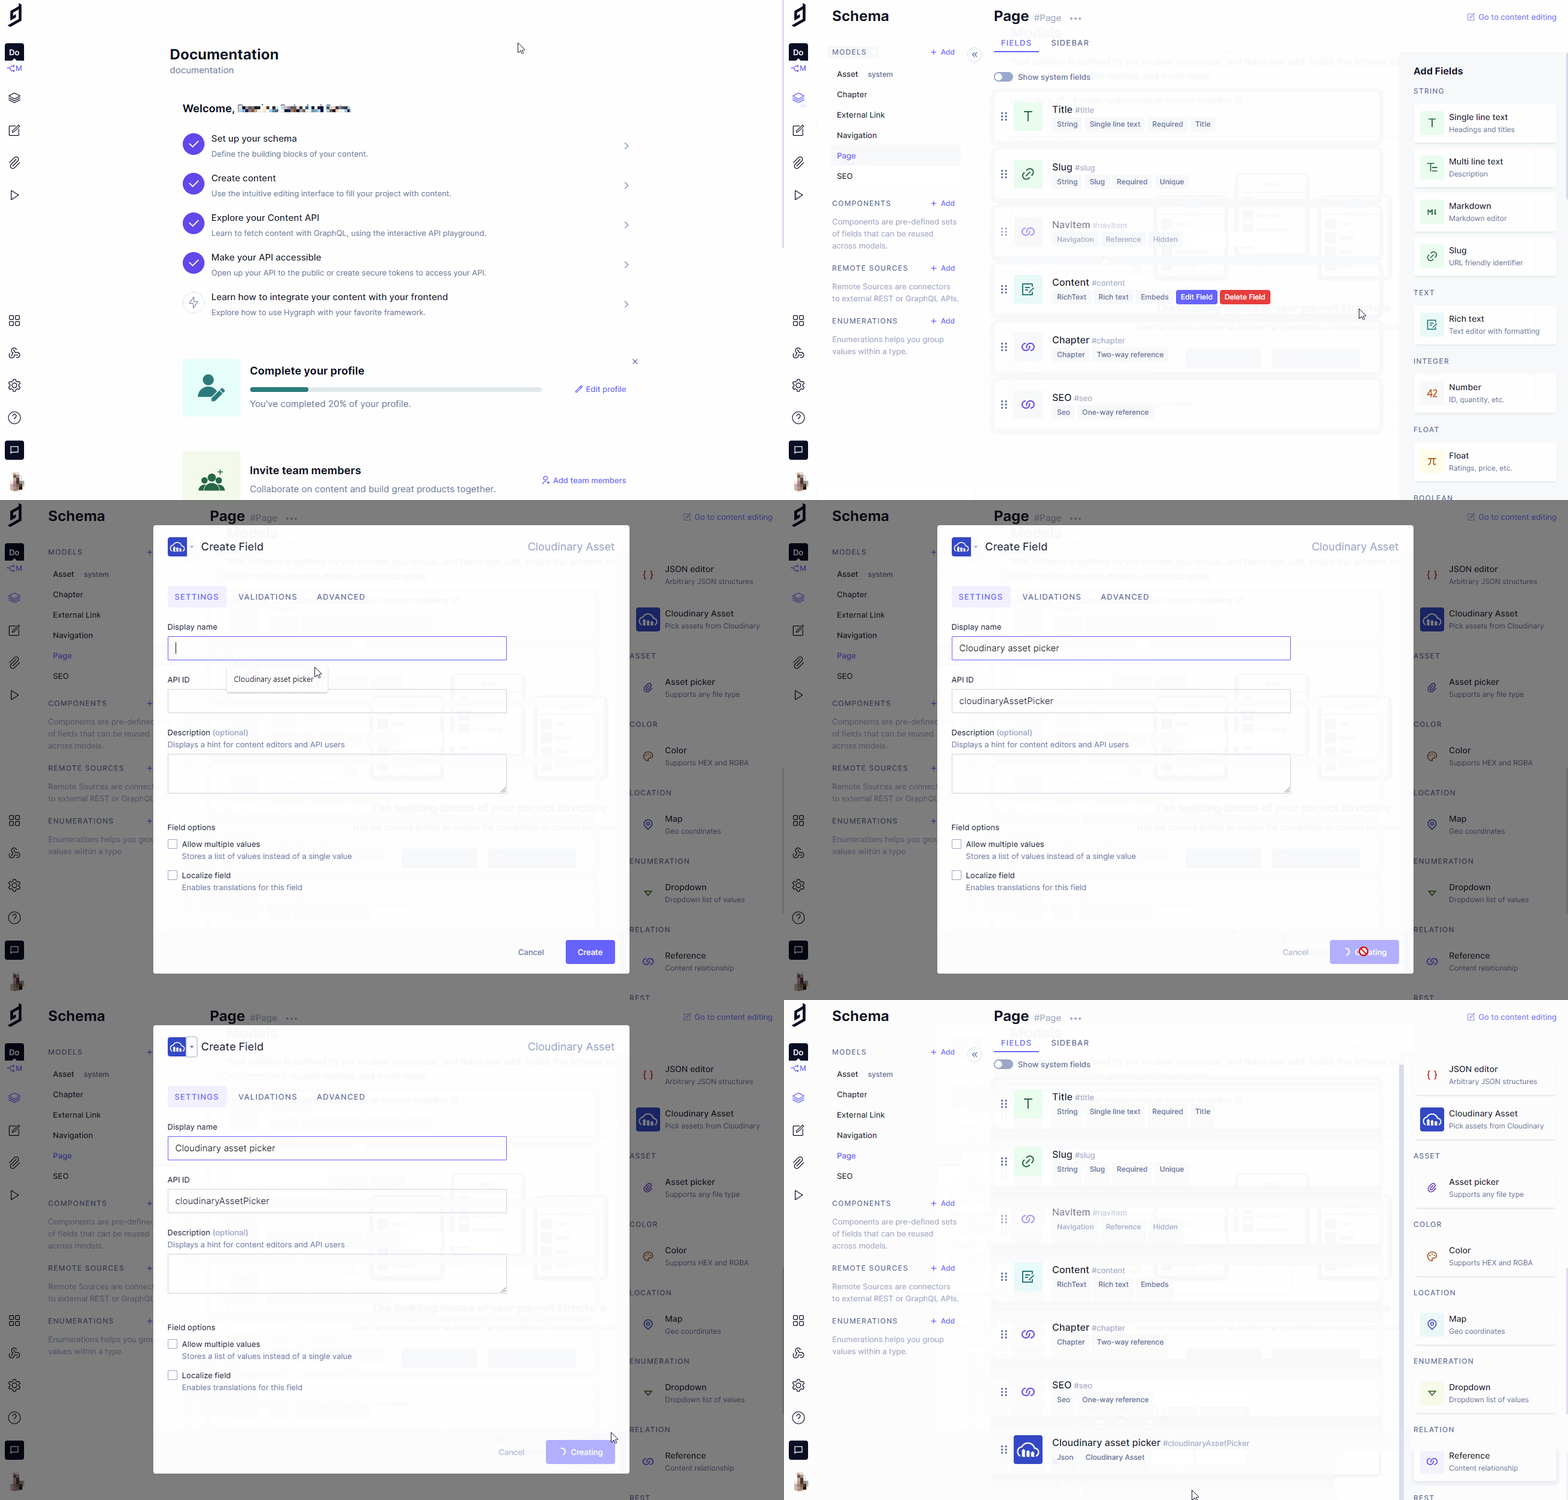 Add the Cloudinary asset field to a model
- Navigate to the Schema builder.
- Select the model that you would like to add the Cloudinary Asset field to.
- Select the Cloudinary Asset field from the Add fields right sidebar.
- Complete the
Display namefield, and theAPI IDwill be auto-filled by the system. Optionally, you can also add aDescription. This screen allows you to control different properties of your Cloudinary asset field: you can allow multiple values, or you can localize the field, by selecting the checkboxes under theField optionssection of the screen. - Click on the
Createbutton.
#Use the Cloudinary asset field in Hygraph
To use the Cloudinary asset field in Hygraph, navigate to the Content Editor and select the model you added the Cloudinary Asset field to.
Click on the Add from Cloudinary button to select an asset hosted in your Cloudinary account.
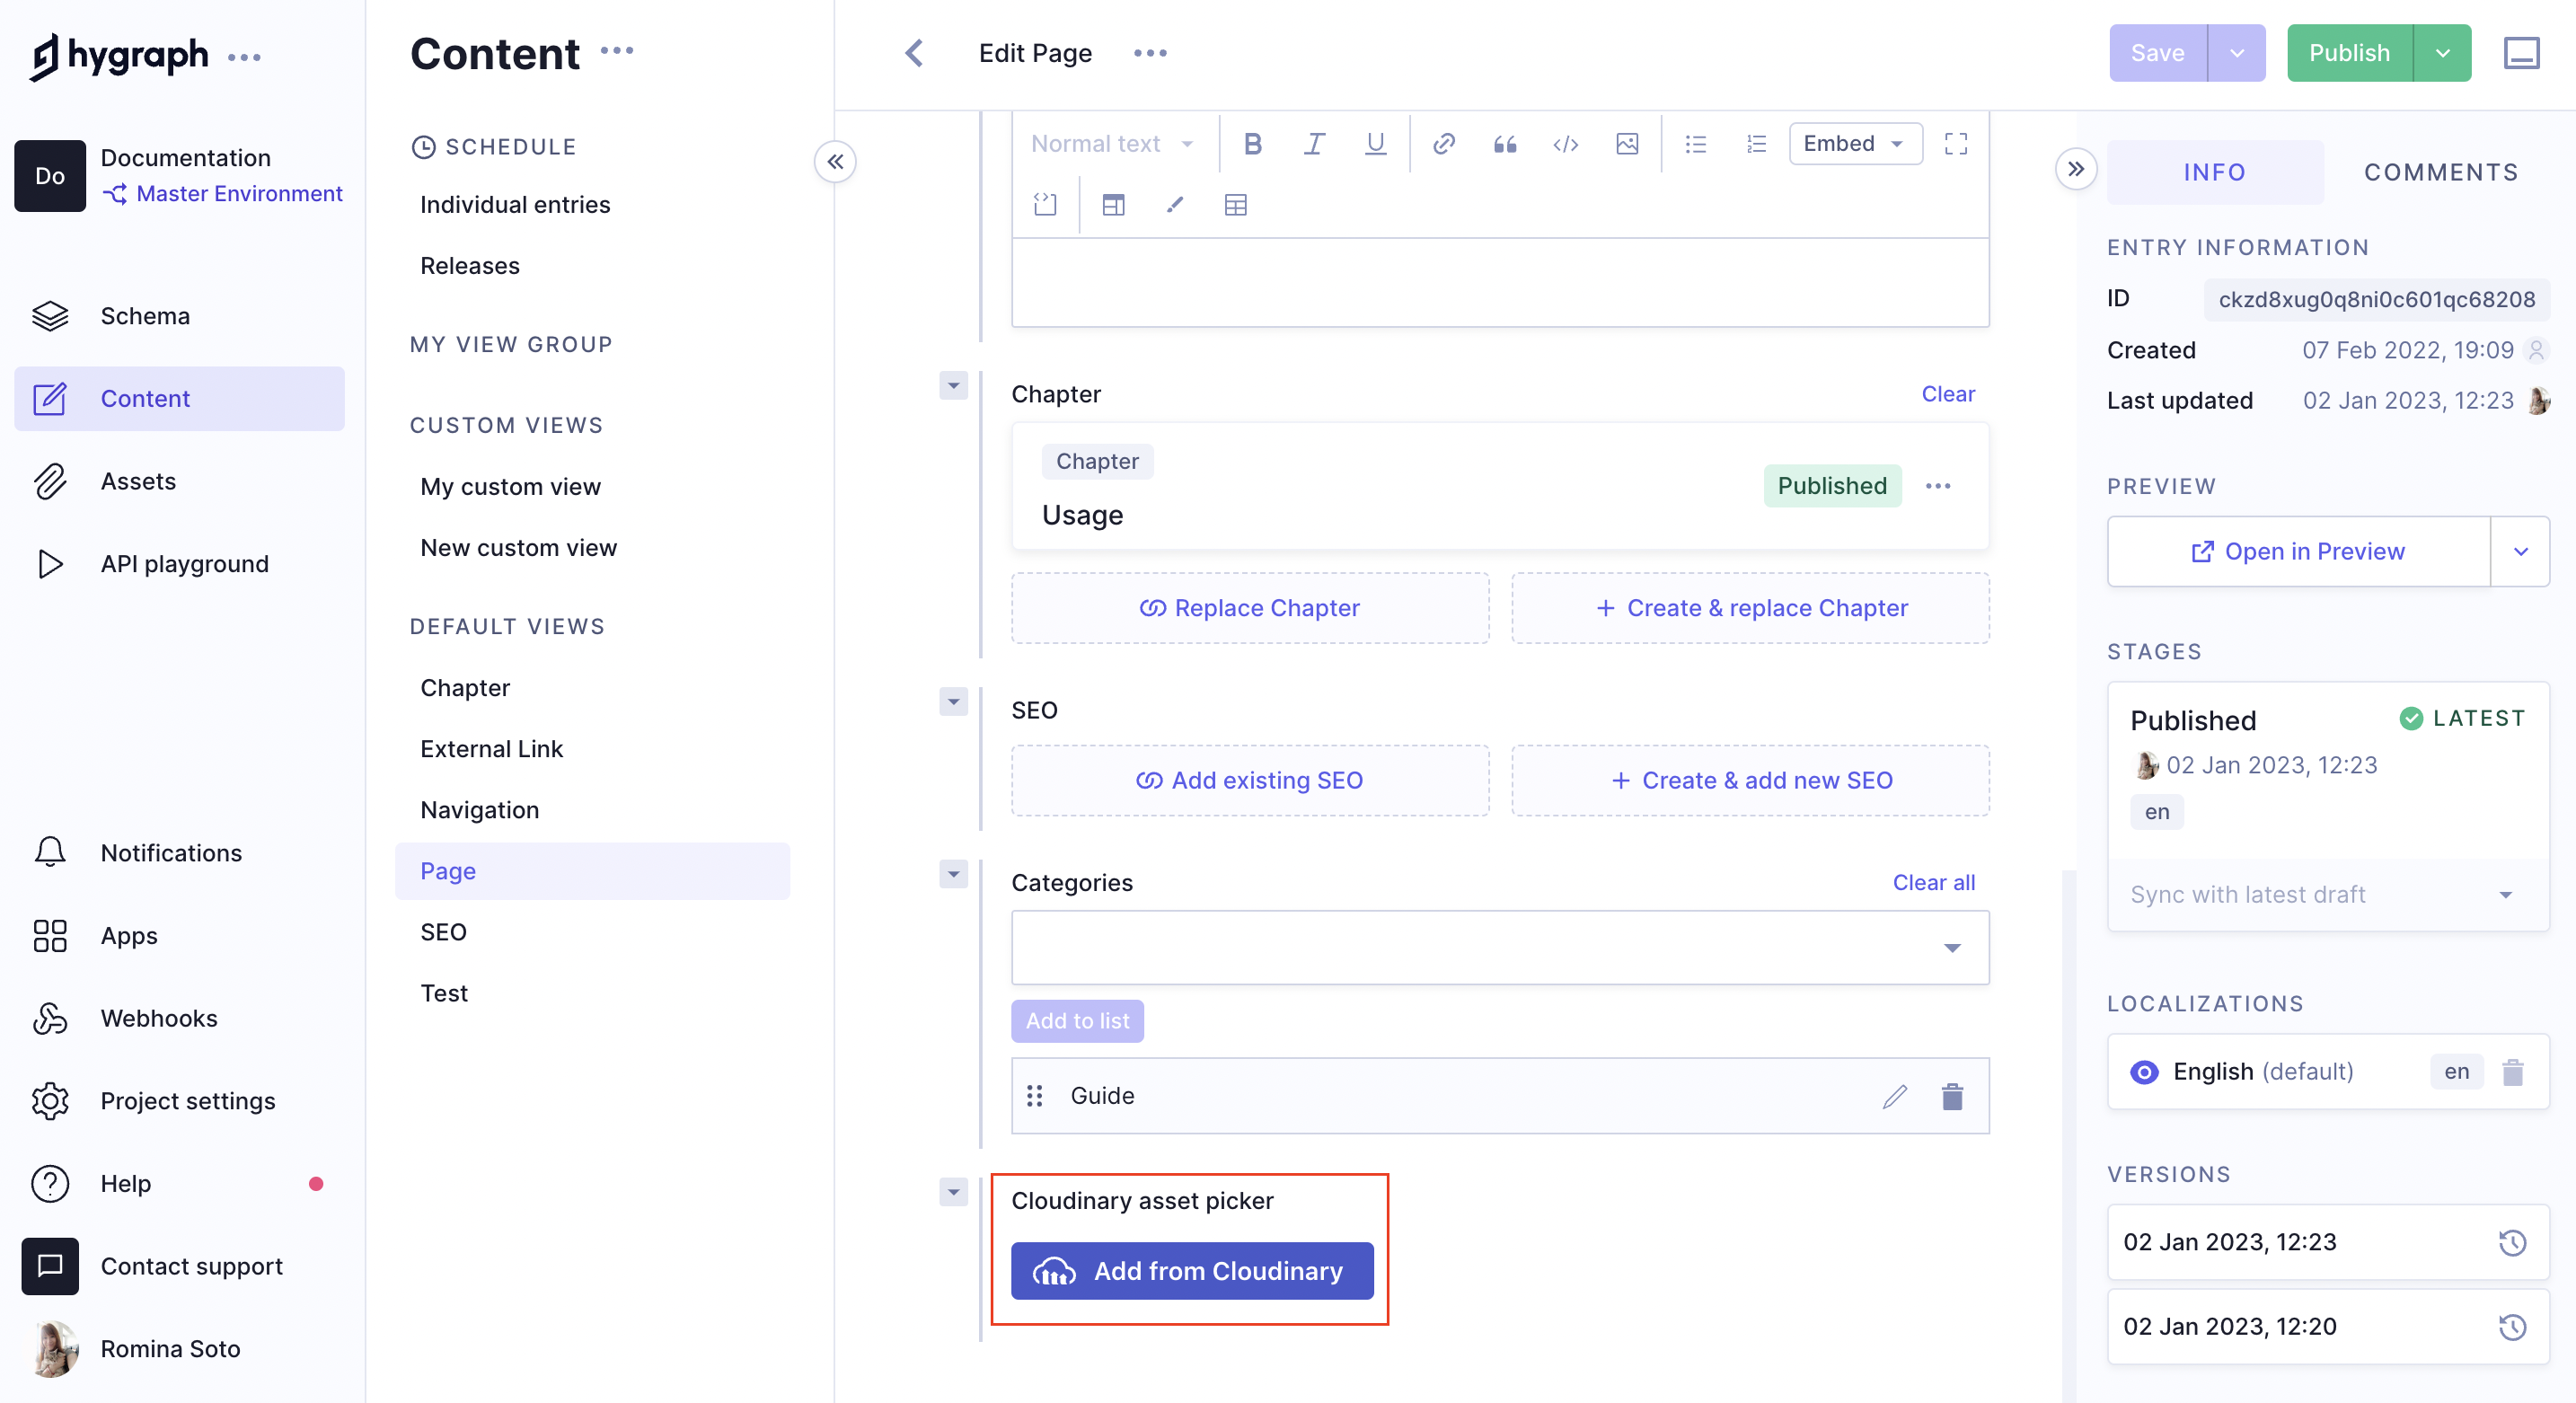 Cloudinary asset field in the Hygraph content editor
If your Cloudinary asset picker schema configuration allows multiple values, you will be able to select multiple assets in a content entry as a result. You can use the six-dot handle to reorder these assets by dragging and dropping them in the order you want:
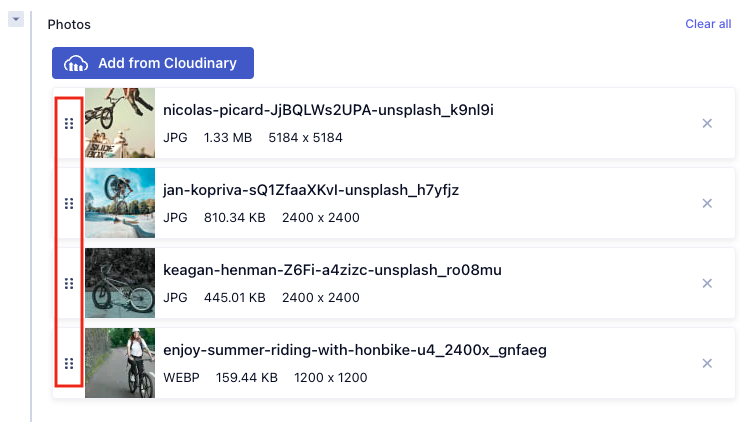 Reorder Cloudinary assets
You can also click on the X on the right of an asset card to remove it form the list.
If you wish to link data from an existing Cloudinary account using a script, please read this document.
#Query your Cloudinary assets
You can query the Cloudinary assets used in your Hygraph project using our API Playground, which you will find on the left side menu of your Hygraph project dashboard.
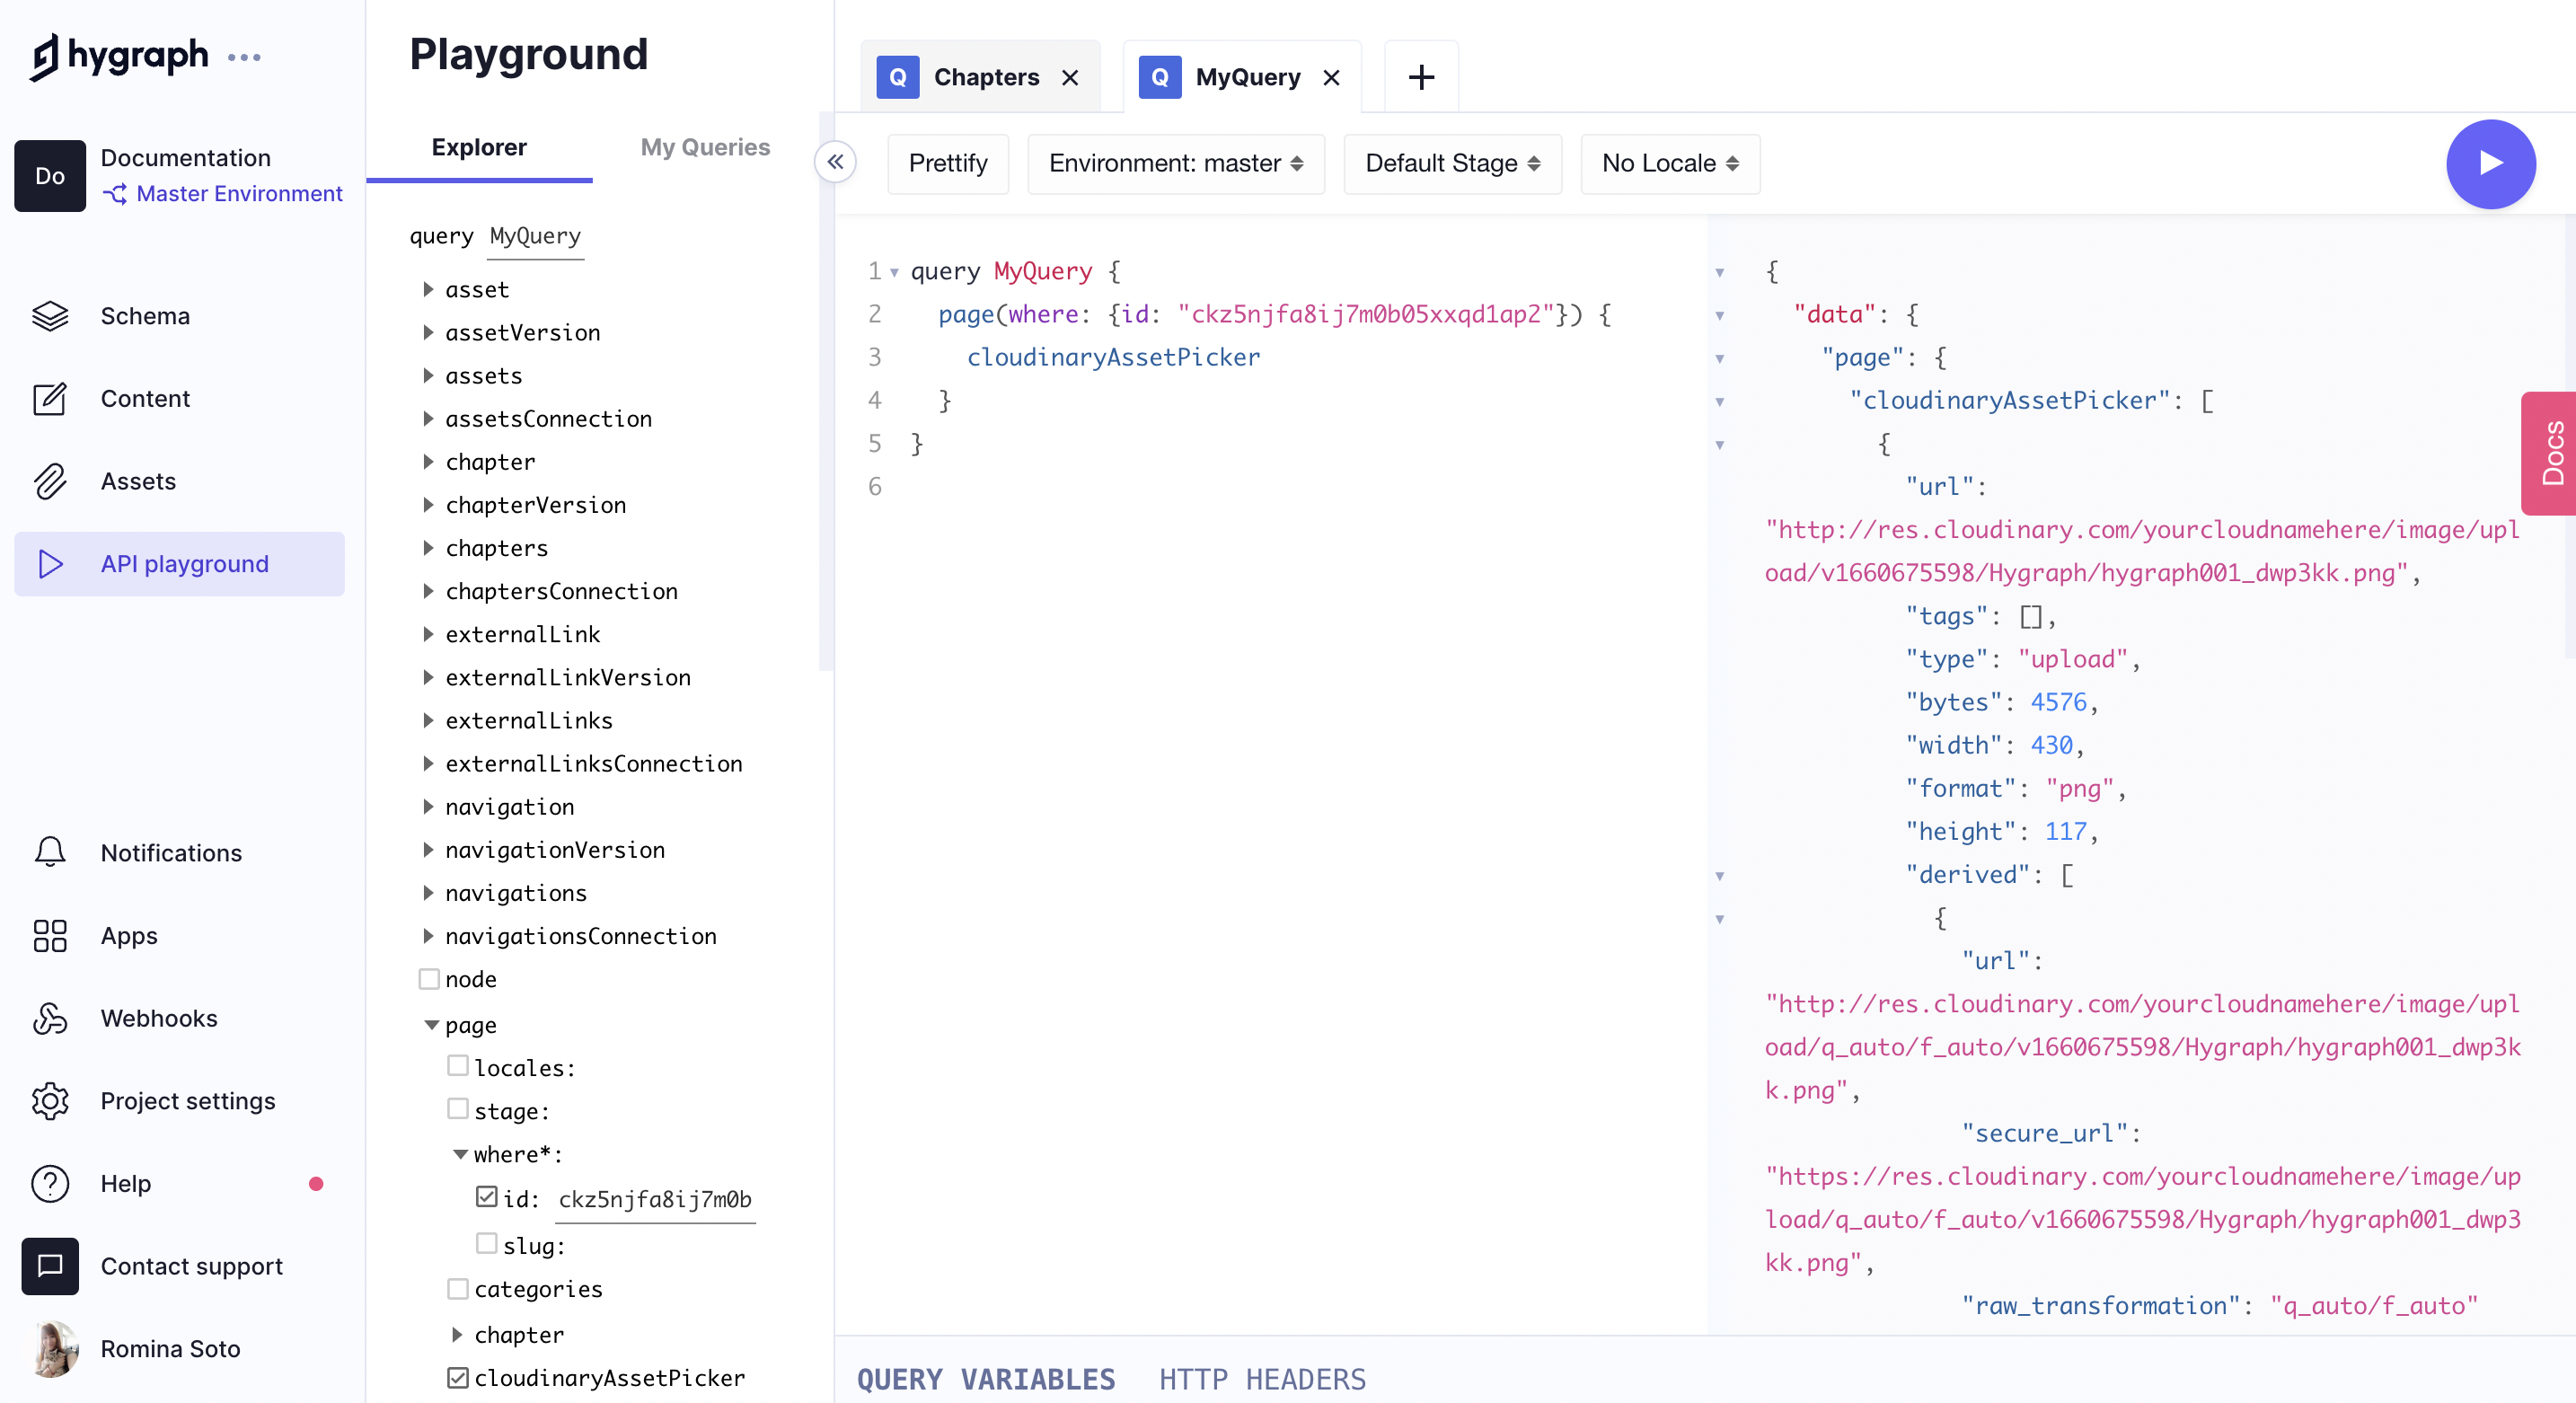 Cloudinary assets query in our API Playground
Find additional information on how to query content in Hygraph here.
#Update Cloudinary field data
In some cases it can be necessary to update Cloudinary data stored in Hygraph, due to an event that happened in Cloudinary - such as an update to an asset's metadata. You can use the following flow to do this:
- Create a simple function, such as a lambda, that can catch a webhook from Cloudinary.
- Using the information in the webhook, such as the asset ID, find the corresponding entries in Hygraph that reference this asset. You can use
JSONfilters to search for IDs in the underlying Cloudinary fields. It's also possible to filter on Cloudinary fields inside components, using the basic and modular component filters. - Update the fields in Hygraph using mutations.
#How to replace the UIX with the new app
Before you delete the Cloudinary UIX, make sure that you have the Cloud Name and API Key in a safe place. You will need them to setup the app.
Here is the step-by-step guide on how to install the Cloudinary app for Hygraph to replace the UIX.
- Remove the Cloudinary UIX from your project. To do that, go to Settings > UI Extensions. Click on the three dots, then click on the
Removebutton. - Click here to install the Cloudinary app.
- Select your project in the dropdown, then click on
Add App. - Enter the
Cloud NameandAPI Keyin the fields, then clickSubmitto save the settings.
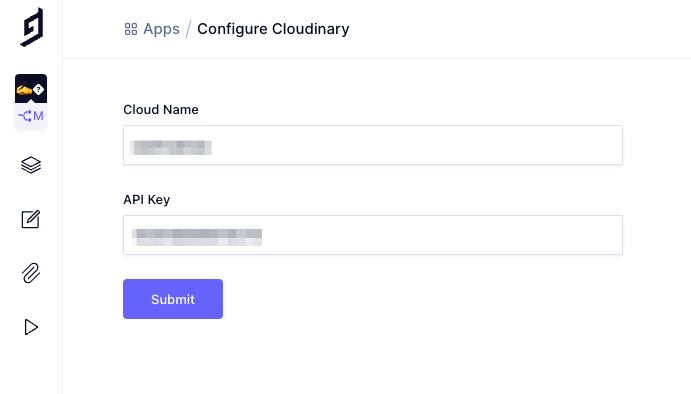 Cloudinary migration - Configuration
- Now, go to the Schema editor and open the model that you are using the Cloudinary asset field in.
- Click on
Edit Field. On the left top corner of the dialog, click on the dropdown, then click onCloudinary asset. Finally, click on theUpdatebutton.
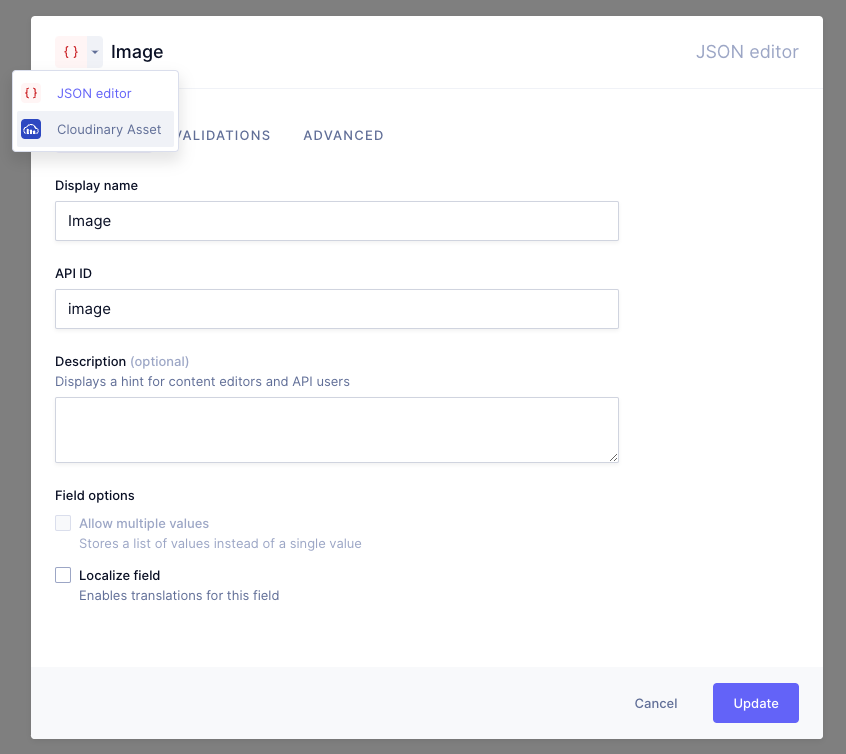 Cloudinary migration - Select asset
#Resources
- Click here to access Cloudinary's online documentation.